How to Configure POS Terminals and Receipts
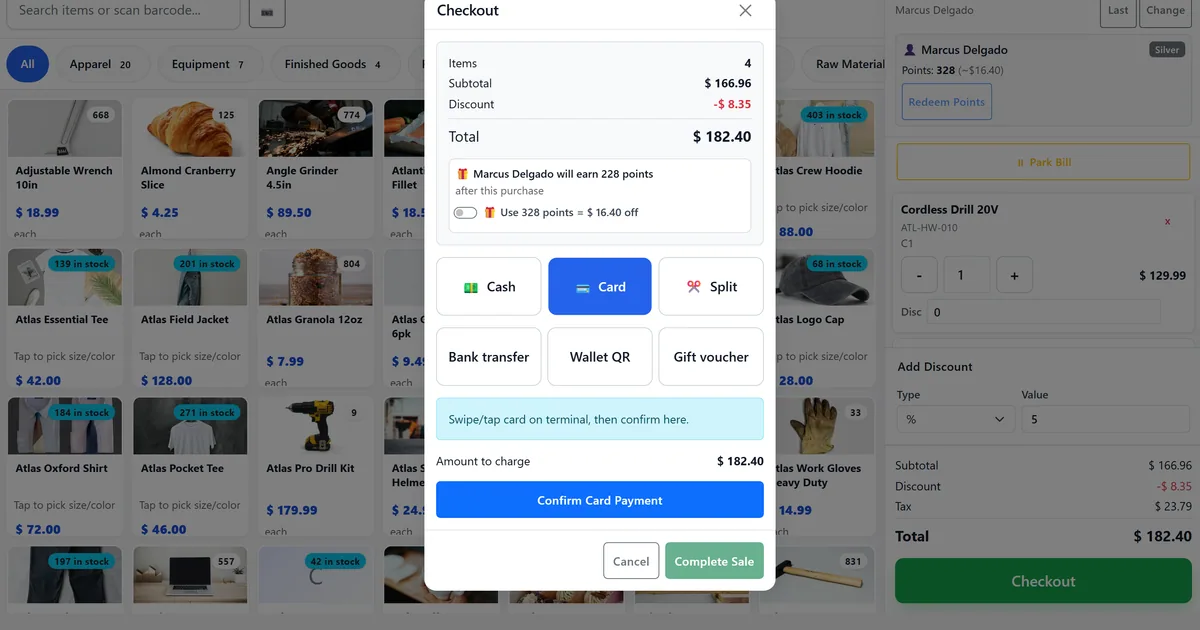
Unnamed tills break tax, branding, and Z attribution
Every laptop uses “Shared Terminal,” so terminal Z cannot separate stores.
Receipts print the legal entity name only, with no store header or footer.
Cash drawers never open because no kick setting was enabled.
Why this happens
- Skipping POS terminals setup before go-live.
- Wrong price display mode vs shelf labels.
- No receipt branding fields filled.
- Assuming drawer hardware works without a print kick path.
Biznsbook addresses this through POS terminal tax mode, receipt header footer logo, open cash drawer setting when the POS module is licensed — terminal and back-office checkout share unified SaleBill posting.
Finance teams lose days each month reconciling versions that should never have diverged. Naming Biznsbook screens as the system of record — and closing periods when agreed — prevents silent edits that auditors flag immediately.
Step-by-step: Configure POS Terminals and Receipts
Built for retailers who need a fast till, float discipline, and the same INV-* sale bill in stock and GL — not a standalone cash register.
- Open POS terminals. Payments → POS terminals (Payment.View). Create or edit a register.
- Set tax defaults. Choose default tax group and Tax exclusive or Tax inclusive price display mode.
- Receipt tax flags. Enable Show tax on receipt and enter tax registration number when required.
- Branding. Set Receipt header name, footer message, and Show company logo on receipt.
- Drawer option. Enable Open cash drawer on cash sale if the receipt printer can pulse the drawer.
- Train open session. Cashiers must pick this terminal when opening float — required validation.
- Test a sale. Complete a cash sale, confirm INV-* receipt branding, optional drawer kick, then a terminal Z for today.
Review results after the first full weekly cycle. Adjust roles, mappings, or approvals where the same exception repeats.
Screen-level flows live in the Help Center. This guide focuses on the business process; help articles cover click-by-click navigation.
Common mistakes to avoid
- Mistake 1: Skipping POS terminals setup before go-live. Repeating this each month usually shows up first in cash reconciliation and till speed.
- Mistake 2: Wrong price display mode vs shelf labels. Repeating this each month usually shows up first in cash reconciliation and till speed.
- Mistake 3: No receipt branding fields filled. Repeating this each month usually shows up first in cash reconciliation and till speed.
- Mistake 4: Assuming drawer hardware works without a print kick path. Repeating this each month usually shows up first in cash reconciliation and till speed.
Track recurring exceptions in month-end notes; each should map to a control above.
Best practices that hold up as you scale
- Open POS terminals — Payments → POS terminals (Payment.
- Set tax defaults — Choose default tax group and Tax exclusive or Tax inclusive price display mode.
- Receipt tax flags — Enable Show tax on receipt and enter tax registration number when required.
- Branding — Set Receipt header name, footer message, and Show company logo on receipt.
- Drawer option — Enable Open cash drawer on cash sale if the receipt printer can pulse the drawer.
Teams that open on a named register, park holds, and close with expected cash keep variance disputes short.
How Biznsbook supports this workflow
POS terminal tax mode is documented in Biznsbook POS capabilities. Use it as part of a controlled finance process — posting, review, and period close — not as an isolated export. When Sales, Purchase, Inventory, Taxation, Expense, or Finance Management modules are enabled, related documents can post through the central accounting posting service with double-entry validation.
receipt header footer logo is documented in Biznsbook POS capabilities. Use it as part of a controlled finance process — posting, review, and period close — not as an isolated export. When Sales, Purchase, Inventory, Taxation, Expense, or Finance Management modules are enabled, related documents can post through the central accounting posting service with double-entry validation.
open cash drawer setting is documented in Biznsbook POS capabilities. Use it as part of a controlled finance process — posting, review, and period close — not as an isolated export. When Sales, Purchase, Inventory, Taxation, Expense, or Finance Management modules are enabled, related documents can post through the central accounting posting service with double-entry validation.
Sessions, barcode, split tender, X/Z reports, and receipt branding are covered in Docs/POS — use Help Center for click-level screens.
Suggested implementation timeline
- Week 1: Document current process gaps and configure POS terminal tax mode with finance owner sign-off.
- Weeks 2–3: Pilot on one month or one entity; post all test transactions through Biznsbook; freeze parallel spreadsheet journals.
- Week 4: Run first trial balance or report tie-out; fix mapping and permission issues.
- Month 2–3: Roll out to full team; add approvals and period close cadence from this guide.
- Ongoing: Monthly review using checklist and leadership dashboard.
Metrics to track monthly
- Open sessions with a selected POS terminal
- Cash sales with ClientRequestId retries that stay single INV-*
- Parked bills resolved before close
- X-reports run mid-shift without closing
- Terminal Z generated per register/day
Start with three metrics; trend direction matters more than a single point-in-time snapshot.
Spreadsheet / manual books vs integrated ERP
Compare typical manual finance work with Biznsbook POS terminal tax mode and related capabilities.
| Capability | Manual / Spreadsheet | Biznsbook |
|---|---|---|
| Register identity | ❌ Anonymous shared till | ✅ Named POSTerminal row |
| Price mode | ❌ Guess inclusive/exclusive | ✅ Configured per terminal |
| Receipt brand | ❌ Company name only | ✅ Header, footer, logo |
| Drawer | ❌ Manual open | ✅ Optional auto kick |
| Session link | ❌ Optional | ✅ Required at open |
| Z attribution | ❌ Mixed totals | ✅ PosTerminalId on SaleBill |
Checklist
Terminals → tax mode → branding → drawer → open session on that register → test INV-* receipt → terminal Z.
Document this in your finance SOP and revisit each quarter as transaction volume or entity structure changes.
Frequently asked questions
Do I need one terminal per PC?
Create one active terminal per physical register you reconcile. Multiple cashiers can sequential-use the same register across sessions.
Where does the logo come from?
Company profile logo when Show logo on receipt is enabled.
Is fiscal QR configured here?
Fiscal credentials are separate; terminal linkage enables submission when fiscal is configured for the company.
Can back-office checkout use these settings?
Yes. PosCheckout requires a terminal id and follows that terminal’s price display mode.
How this differs by industry
Retail
Each lane gets a named terminal with store header on the 80mm receipt.
Wholesale & distribution
Showroom counters set tax-exclusive mode for B2B desk sales.
Manufacturing
Plant shops set inclusive shelf pricing and a short thank-you footer.